

I use technology more in some classes than I do in others. The reason for this is largely down to what resources and equipment are available.
If I am teaching in a classroom that only has a CD player, that doesn’t mean I can’t use technology to help me. That is the whole reason for technology, to make things easier and more efficient for us.
As long as you have one computer, and one printer, you can design and customize material for your classes.
So this week, I am sharing four word documents that I keep on my computer as templates. They are not original activities, but can usually get students speaking and thinking about language.
Feel free to download and use the templates if you want them.
Create an A & B Dictation
An A & B dictation is a great way to present an example dialog. Instead of chorusing a dialog from the textbook or from the board, get your students talking straight away!

This is template that I use. There are 4 lines for A and 4 lines for B. I think anything over 8 lines would be too long.
Click on A and B Dictation to download the word document, or visit the downloads page.
When you open the document, type your conversation in the space provided.
There are actually 3 columns. The first column is the speaker (A), the second column is for the colon (:) and the third column is a blank space for text.
You can type A in the top and B at the bottom, however to save myself from going up and down the page, I type the whole conversation in Student A’s section. After that, I select Student B’s text and I cut (Ctrl+X) and paste (Ctrl+V) it into Student B. Print it out and it’s ready to photocopy.
This is a common activity. Demonstrating it only takes a short time and the students will know exactly what to do.
It is worth writing some useful words or phrases on the board, so that students can ask for help with spelling. With higher levels, I also ask them to check with questions like: “Is there any punctuation?” It can save some time to remind students that if there is a word they don’t know (that you didn’t anticipate), it’s okay. Spell it out and keep going (You can talk about it afterwards).
After the activity is finished:
- Change pairs and peer check.
- Highlight the target language in the conversation that is the focus of the lesson.
- Elicit substitutions from the students. New words to change the conversation to personalize it.
- Practice the ‘new’ conversation
I like doing this sort of activity because it generates a lot of speaking time.
Create Your Own Cards
Cards can be used for pretty much anything you can imagine. Photocopiable resources will often use cards in games, matching activities or as prompts.
There are a lot of interesting activities you can do if you make your own cards. However, It’s always a gamble whether all the cards will get returned. At least with a digital copy, it is easy to replace a set. Just print.

Click on Blank Cards to download the word document, or visit the downloads page.
There is a single page containing ten cards. If you need more cards, simply copy the page.
Here are a couple of suggestions for using cards:
Mad Libs
Mad Libs was a game invented in 1953 by Leonard Stern and Roger Price. This game has been adapted by countless ESL teachers for their students, because it’s great way to teach parts of speech and it’s funny as well. Writing your own Mad Libs means you can customize them to what you have been studying in class.
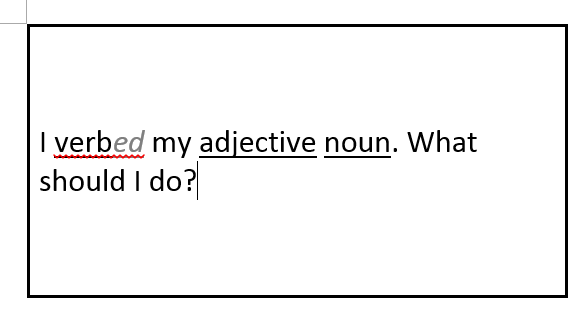
This is an example of a Mad Lib card. The student picks up the card and reads it out, replacing the parts of speech with a new word.
Rather than use the phrase past simple I have replaced it with verbed, because I personally felt ~ed and ~ing were helpful indicators of which verb tense they should use.
Students can make any sentence they want.
It can be normal – I lost my new bicycle. What should I do?
It can be strange – I sold my red tiger. What should I do?
I like this activity because it generates small bursts of conversation. It can get very silly and it’s useful for practicing parts of speech.
What do you know?
This is an information gathering activity. Each student is giving at least one card with a piece of information on it. They have to collect the other pieces of information by asking the other students – “What do you know?”
If you were teaching schedules, you might make a card like this.

Student A: What do you know?
Student B: I know that Jack is working on Friday afternoon, but he is meeting his friends in the evening.
Student A Writes notes on his diary page.
Student B asks Student A. Student B writes. Change pairs. Repeat until all information is gathered.
This works very well as a mingling activity and all the students are involved.
Word Cards & Matching
Matching activities are used a lot. Where students try to find two words that are connected.
In this example I have used “Fish Tank” because every time I look away from my screen, I can see my fish tank on the other side of the room.

Make a set of cards that match (or make a pair) and ask the students to match them. This can be done a number of ways.
- The cards face up on the table and the students match them
- The cards face down on the table. The students turn over two cards and if they match, they make a sentence with the word. If they don’t match, they turn the cards over again.
- Give a card to each student. All the students ask each other “What’s your word?” if they think their words match, write their answers on the board. If you have mismatches, students can talk in pairs to peer correct.
Create a Matching Table
Matching tables are a good way to introduce new vocabulary or phrases. You often see matching tables in textbooks. But you might want to make your own, especially if you want to review language that came up in class.

Click on Matching Table to download the word document, or visit the downloads page.
There are 10 rows in the matching table. If you don't need all the rows, highlight the rows you don't need and delete them by pressing backspace. You will see four options. Select 'delete entire row.'
Type in your words or phrases that match. For example, A is Fish and 1 is Tank. When your table is complete, sort your words alphabetically.
The method for sorting was discussed in a previous post. If you missed it though, check out the image below.

After you have sorted your words, you have an activity to encourage students to think about which words go together. Students might try and complete the matching table quietly and by themselves. Encourage students to work in pairs or small groups and talk about their ideas.
It is worth writing some useful phrases on the board to help students express what they think the answer is.
Create Sentence Strips
Sentence strips can be used separate text into individual sentences. Sentence can take up some time to cut. If you don’t have the time to cut the strips up, then the alternative to sentence strips is to sort the text. Using the same method as above.
If you don’t mind cutting the strips up, then this template might be useful.

This activity is often done as a listening exercise, but it can also be used to get students to think about the order of a conversation and appropriate responses.
Click on Sentence Strips to download the word document, or visit the downloads page.
The template has 15 rows. If you need more, copy the page or right click on the table and insert new rows. If you need less rows, highlight them and press backspace, then select 'delete entire row.' To change the height of the rows, go to layout and change the height.

After you have typed up your sentences. Print, photocopy and cut them up.

3 thoughts on “Four MS Word templates for making your own material!”